Shop by Department

Sold By: Allin Store
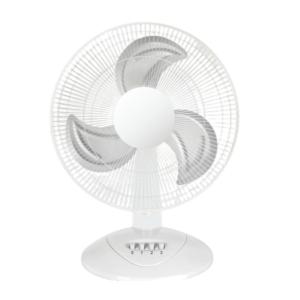
The Miralux 16-inch fan with a power of 40 watts gives you fresh air with an elegant and quiet design that suits every room. Ideal for summer days Easy to use, provides effective cooling without discomfort. Choose smart comfort today with the Miralux 16 Inch - 40 Watt Floor Fan
SKU: JWZE20301
Categories: Electronics
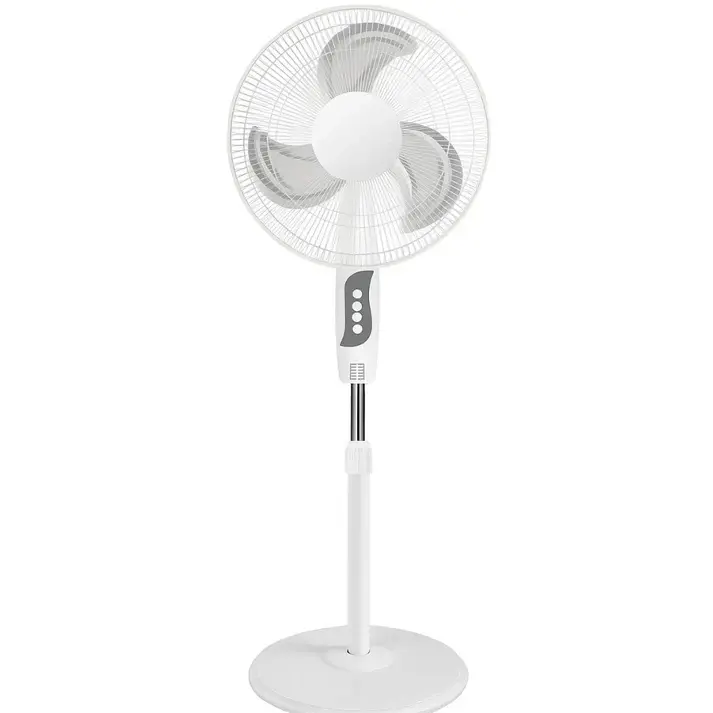
Stay cool and comfortable all day with the MIRALUX 16-Inch Stand Fan. Designed for modern homes, this fan combines sleek aesthetics with powerful airflow, making it the perfect companion for hot days and stuffy rooms. Whether you're working, relaxing, or sleeping, its quiet operation and adjustable height ensure a breeze that suits your space and mood.
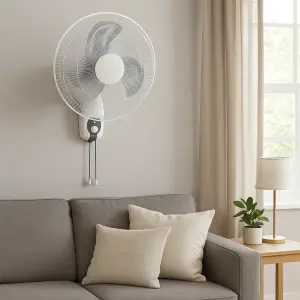
16"" WALL FAN
220-240V 50/60-
Power: 60W
Qty: 1PCS/CTN
Size : 430*430*1300mm
Up & Down Tilt Mechanism Motor Protection Thermal Overload Protection Devise 90-Dagren Oscillation 3-Speed Switch Control Extra Protection Against Corron With Powder-Coated Guard & Polymer Ring
Aerodynamically Designed metal Blades For High Air DElivary
ASSEMBLY OF BASE:
1. Take the base and column parts from the packing box and loose theplastic nut.
2. Fix the column on the base plate using the plastic nut. Unscrew the height adjusting knob.
3. Mount the column ornament, andmove to the desired height.
4. Then screw the height adjusting knob totighten the extension pole.
CAUTION: Height adjustment ring must be fully fastened before the assembly of the motor section to the stand.
ASSEMBLY OF BLADE OF GRILLES:
1. Remove the spinner on the head unit by turning it clockwise. Then remove the plastic nut by turning it counterclockwise.
2. Place the rear guard to the head unit make sure the handle is upward.
3. Screw on the plastic nut (clockwise) securing the fan guard on the the head unit.
4. Discard the small plastic sleeve located on the motor shaft.
5. Install the fan blade onto the motor shaft. Make sure the fan blade slot fits into the retaining pin of the motor shaft.
6. Attach the spinner to the motor shaft by turning it counterclockwise to secure the fan blade.
7. Secure both guards firmly by tightening the fan guard then close easy clips
OPERATING INSTRUCION:
1. Speed is controlled by depressing the piano keys.
1-Lower
2-MediuM
3-High
2. To make/stop the fan head oscillate. Push down/pull up the clutch knob.
3. The airflow can be adjusted upward or downward by loosening the tilt adjustment knob and adjusted the vertical angle as desired. Retighten the knob securely.
4. The height of the fan can be adjusted by loosening the height adjustment ring carefully raising or lowering the fan and firmly tightening the ring.
MAINTENANCE INSTRUCTION:
The fan requires little maintenance. Do not try to fix it by yourself. Refer it to qualified service personnel if service is needed.
1. Before cleaning and assembling, do not plug the pins into the socket.
2. To ensure adequate air circulation to the motor. Keep vents at the rear of the motor housing from dust, fluff and etc. A vancuum cleaner can not be used to clean these vents before unplug. Do not disassemble the fan remove fluff.
3. Please wipe the exterior parts with a soft cloth soaking a mild detergent.
Do not use any abrasive detergent or solvents to avoid scratching the sufrace.
Do not use of the following as a cleaner: gasoline, thinner, bending.
4. Do not allow water or any other liquid into the motor housing or interior parts.
CLEANING:
1. Be sure to unplug from the electrical supply source before cleaning.
2. Plastic parts should be cleaned with a soft cloth moisten with mild soap.
Thoroughly remove soap film with dry cloth.
DISPOSAL: Do not dispose of electrical appliances as unsorted
municipal waste, use separate collection facilities. Contact you local government for information regarding the collection systems available. If electrical appliances are disposed of in landfills or dumps, hazardous substances can leak into the groundwater and get into the food chain, damaging your health and well-being.
CAUTION
Read the Following Rules for Safe Operation and Instructions Carefully.
WARNING:
1. Do not leave the fan running unattended.
2. Keep electrical appliances out of reach from Children or infirm persons. Do not let them use the appliances without supervision.
3. Ensure that the fan is switched off from the supply mains before removing the guard
4. If the supply cord is damaged, it must be replaced by manufacturer or its service agent or a similarly qualified person in order to avoid a hazard.
5. This appliance is not intended to use by persons (including children) with reduced physical, sensory or mental capabilities, or lack of experience and knowledge, unless they have been given supervision or instruction concerning use of the appliance by a person responsible for their safety.
6. Children should be supervised to ensure that they do not play with the appliance.
RULES FOR SAFE OPERATION:
1. Never insert fingers, pencils, or any other object through the grille when fan is running.
2. Disconnect fan when moving from one location to another.
3. Disconnect fan when removing grilles for cleaning.
4. Be sure fan is on a stable surface when operating to avoid overturning.
5. DO NOT use fan in window, rain may create electrical hazard.
6. Indoor use only.
PART FIGURE:
1. Front guard
2. Spinner
3. Fan blade
4. Plastic nut
5. Rear guard
6. Clutch knob
7. Timer Switch
8. Speed Switch
9. Inner tube
10. Height adjustment ring
11. Outer tube
12. Base
13. Screw
faisal allin has joined the document.16"" WALL FAN 220-240V 50/60- Power: 60W Qty: 1PCS/CTN Size : 430*430*1300mm Up & Down Tilt Mechanism Motor Protection Thermal Overload Protection Devise 90-Dagren Oscillation 3-Speed Switch Control Extra Protection Against Corron With Powder-Coated Guard & Polymer Ring Aerodynamically Designed metal Blades For High Air DElivary ASSEMBLY OF BASE: 1. Take the base and column parts from the packing box and loose theplastic nut. 2. Fix the column on the base plate using the plastic nut. Unscrew the height adjusting knob. 3. Mount the column ornament, andmove to the desired height. 4. Then screw the height adjusting knob totighten the extension pole. CAUTION: Height adjustment ring must be fully fastened before the assembly of the motor section to the stand. ASSEMBLY OF BLADE OF GRILLES: 1. Remove the spinner on the head unit by turning it clockwise. Then remove the plastic nut by turning it counterclockwise. 2. Place the rear guard to the head unit make sure the handle is upward. 3. Screw on the plastic nut (clockwise) securing the fan guard on the the head unit. 4. Discard the small plastic sleeve located on the motor shaft. 5. Install the fan blade onto the motor shaft. Make sure the fan blade slot fits into the retaining pin of the motor shaft. 6. Attach the spinner to the motor shaft by turning it counterclockwise to secure the fan blade. 7. Secure both guards firmly by tightening the fan guard then close easy clips OPERATING INSTRUCION: 1. Speed is controlled by depressing the piano keys. 1-Lower 2-MediuM 3-High 2. To make/stop the fan head oscillate. Push down/pull up the clutch knob. 3. The airflow can be adjusted upward or downward by loosening the tilt adjustment knob and adjusted the vertical angle as desired. Retighten the knob securely. 4. The height of the fan can be adjusted by loosening the height adjustment ring carefully raising or lowering the fan and firmly tightening the ring. MAINTENANCE INSTRUCTION: The fan requires little maintenance. Do not try to fix it by yourself. Refer it to qualified service personnel if service is needed. 1. Before cleaning and assembling, do not plug the pins into the socket. 2. To ensure adequate air circulation to the motor. Keep vents at the rear of the motor housing from dust, fluff and etc. A vancuum cleaner can not be used to clean these vents before unplug. Do not disassemble the fan remove fluff. 3. Please wipe the exterior parts with a soft cloth soaking a mild detergent. Do not use any abrasive detergent or solvents to avoid scratching the sufrace. Do not use of the following as a cleaner: gasoline, thinner, bending. 4. Do not allow water or any other liquid into the motor housing or interior parts. CLEANING: 1. Be sure to unplug from the electrical supply source before cleaning. 2. Plastic parts should be cleaned with a soft cloth moisten with mild soap. Thoroughly remove soap film with dry cloth. DISPOSAL: Do not dispose of electrical appliances as unsorted municipal waste, use separate collection facilities. Contact you local government for information regarding the collection systems available. If electrical appliances are disposed of in landfills or dumps, hazardous substances can leak into the groundwater and get into the food chain, damaging your health and well-being. CAUTION Read the Following Rules for Safe Operation and Instructions Carefully. WARNING: 1. Do not leave the fan running unattended. 2. Keep electrical appliances out of reach from Children or infirm persons. Do not let them use the appliances without supervision. 3. Ensure that the fan is switched off from the supply mains before removing the guard 4. If the supply cord is damaged, it must be replaced by manufacturer or its service agent or a similarly qualified person in order to avoid a hazard. 5. This appliance is not intended to use by persons (including children) with reduced physical, sensory or mental capabilities, or lack of experience and knowledge, unless they have been given supervision or instruction concerning use of the appliance by a person responsible for their safety. 6. Children should be supervised to ensure that they do not play with the appliance. RULES FOR SAFE OPERATION: 1. Never insert fingers, pencils, or any other object through the grille when fan is running. 2. Disconnect fan when moving from one location to another. 3. Disconnect fan when removing grilles for cleaning. 4. Be sure fan is on a stable surface when operating to avoid overturning. 5. DO NOT use fan in window, rain may create electrical hazard. 6. Indoor use only. PART FIGURE: 1. Front guard 2. Spinner 3. Fan blade 4. Plastic nut 5. Rear guard 6. Clutch knob 7. Timer Switch 8. Speed Switch 9. Inner tube 10. Height adjustment ring 11. Outer tube 12. Base 13. Screw J302 Covered by Drawing, Drawing
Sed magni enim pariatur ipsa. Consequatur soluta cupiditate itaque voluptatum. Dolorem recusandae incidunt maxime aut et.
KWD5.650
KWD5.000
KWD6.900
KWD3.150
KWD1.900
KWD0.900